Dreaming Bigg: How to complete an amazing caravan reno
A chance meeting inspired makeup artist and BIG4 guest blogger, Erin Bigg, to create the caravan of her dreams. Here, she details her family’s epic van renovation journey.
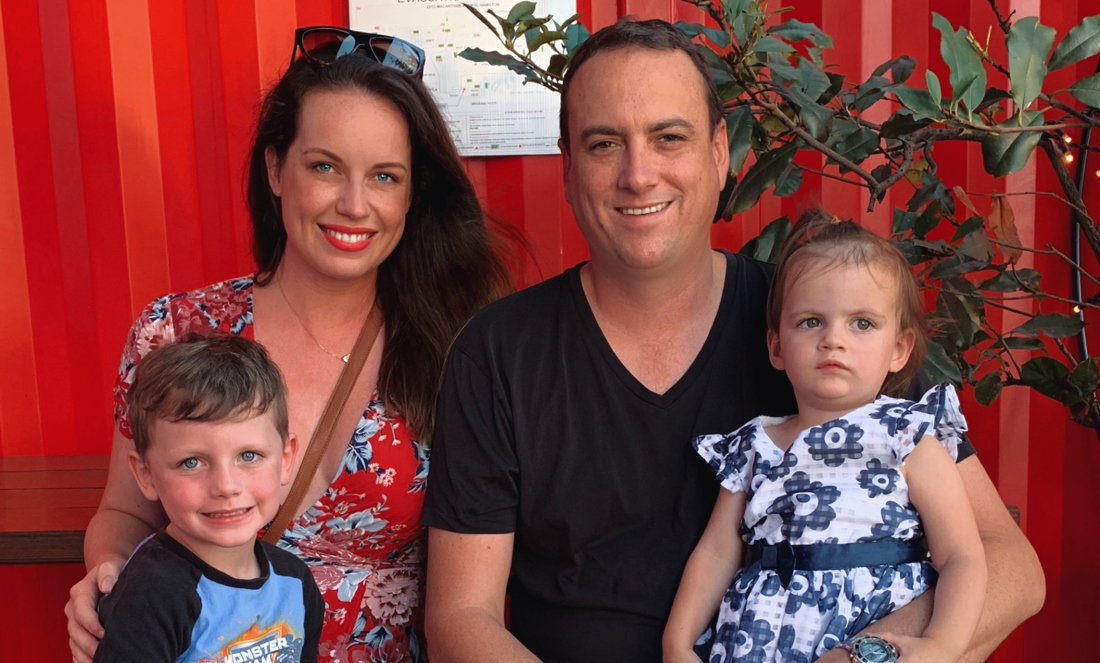
From Bigg things: Erin and her family successfully completed a major renovation.
The background story
I’m a makeup artist and cosmetics company owner by day. On the weekends I moonlight as somewhat of a retro caravan lover and adventure seeker. Believe it or not, it was my day job that led me down this path…
Early in 2018, I was assigned to do makeup on the glorious Carlene Duffy (The Block, Cedar and Suede) for one of her appearances in Brisbane.
We chatted about her joint caravan renovation projects with her husband, Michael. I left our appointment with a head full of ideas for a bohemian house on wheels and a mission to create a ‘mobile holiday’ that we could take wherever we wanted.
Where do we begin?
I knew this would certainly make our current process significantly easier: Setting up tents and tarps while chasing after two small children!
I came home and excitedly told my husband, Troy, my idea to purchase an old caravan to renovate. He looked at me with a blank expression, which then switched to one of confusion and, finally, amusement.
It appeared that this was not so much my idea after all. He had been trying to pitch this project to me for years!
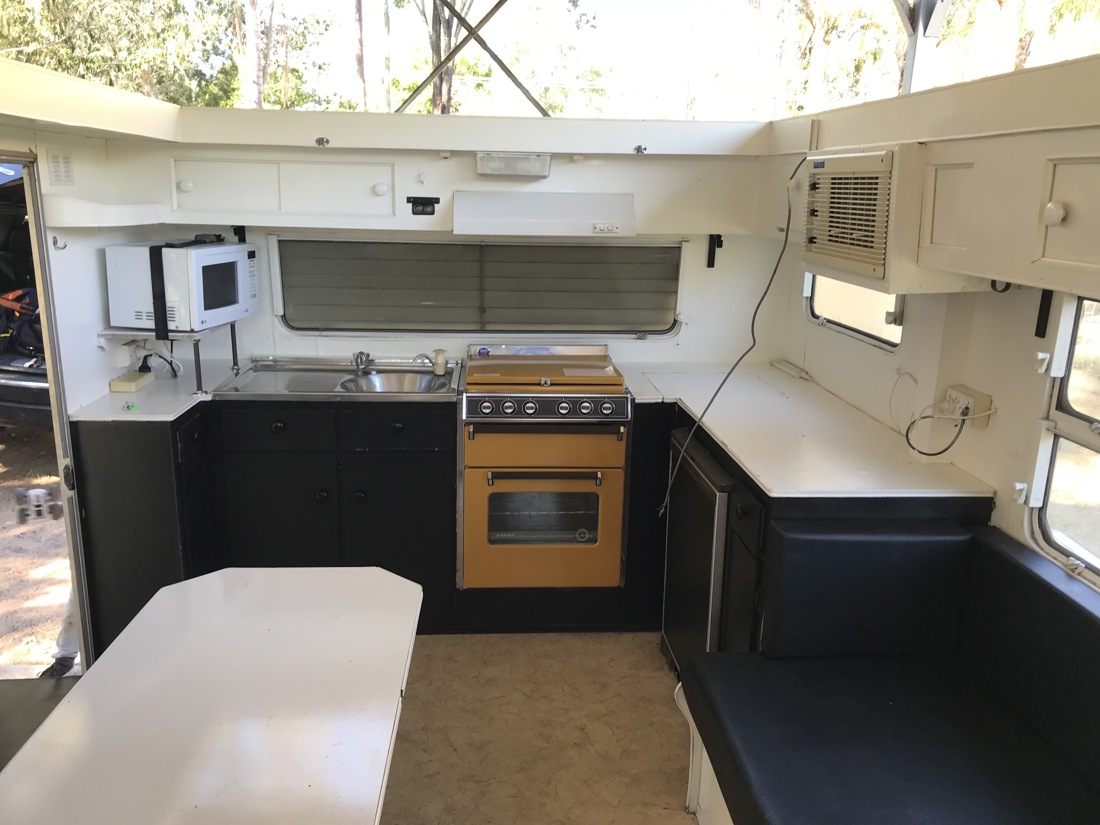
Does the oven survive? Read on for more...
The purchase
We began our search for the perfect retro caravan that we could make our love project. This was no easy feat as Troy is 6’4”, so we needed to find something with ample head room.
We searched laboriously online and looked at quite a few caravans. Some were too small, some had little head room, others had severe water damage or were ridiculously overpriced.
In May 2018, we finally found our perfect project. A 1988 Windsor Pop-Top we found on the Sunshine Coast via Gumtree. She is 19ft in length, and with a dual axle she tows like a dream!
Upholstery only a mother could love.
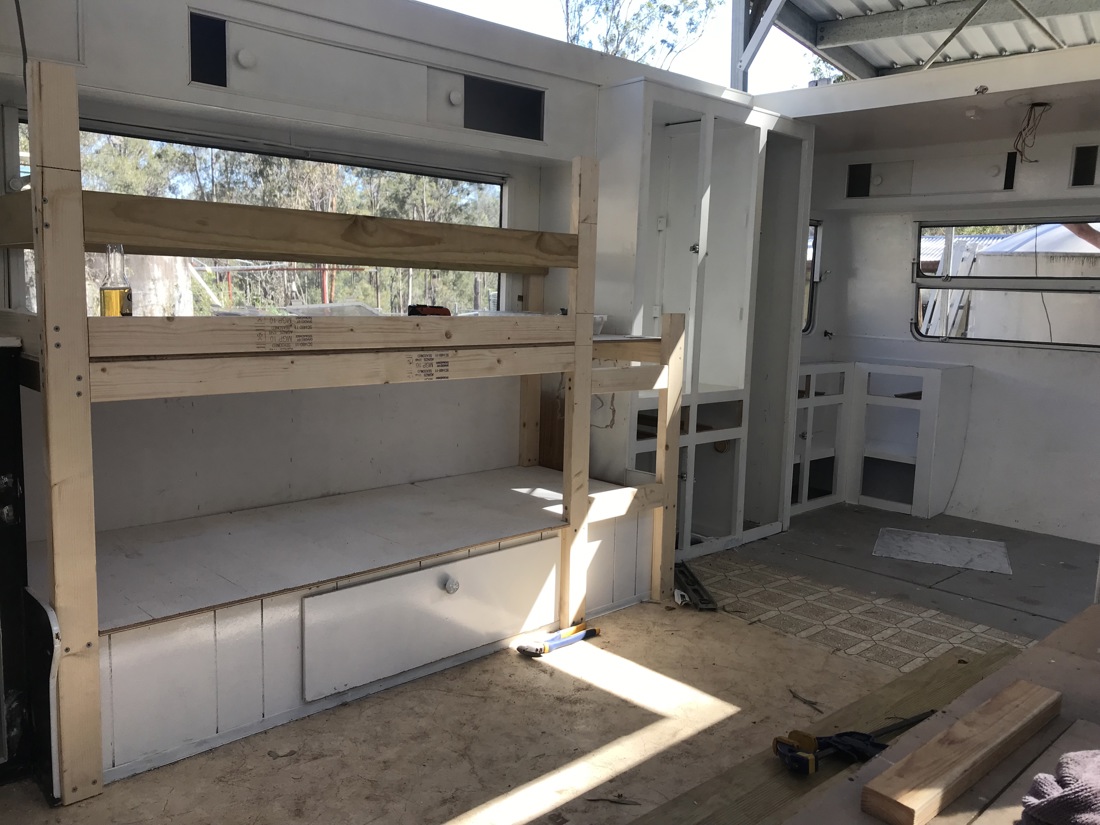
The renovation
The interior renovation took six months of solid weekends and an additional two weeks of holidays from our ‘day jobs’. To say this renovation was a family effort is an understatement.
We are very fortunate to have both sets of parents who live close by. This meant we often had help with our children, Hugo, 4 and Piper, 18 months, at the time. Often the kids ‘helped’ with the renovation, but productivity strangely seemed to be at an all-time low on those days!
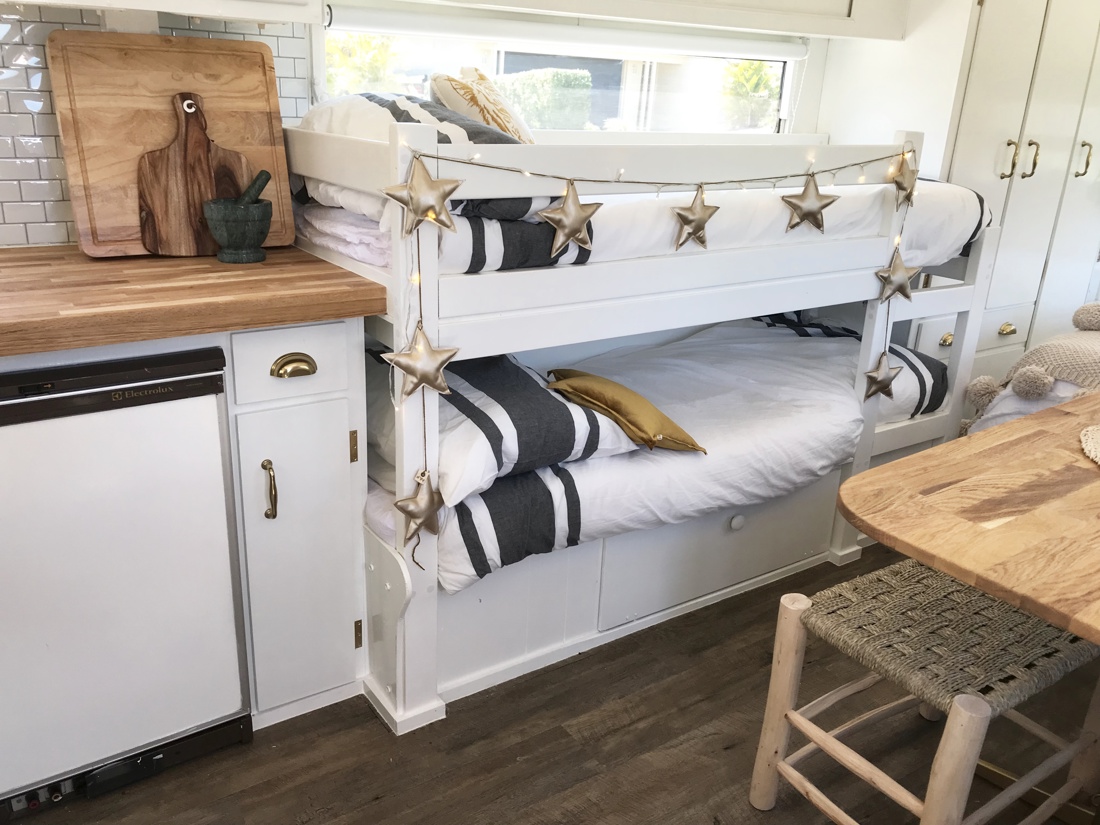
Troy has a corporate day job but is no amateur when it comes to power tools. He lovingly built the kids’ bunk beds, rebuilt the double bed converting it to a queen, and also re-built some of the cabinetry with a helping hand from his very talented father.
I re-painted the entire van by hand in white gloss enamel, including inside all drawers and cupboards – eeeeek! What a job!

'Helping': The renovation was a family effort.
We made a good team. Troy focused on a lot of the structural details while I ticked off the attention-to-detail tasks and styling checklist. Here is a quick rundown on some of the things we did:
- Replace flooring and walls to the back end (water damage)
- Fix framing in front end (water damage)
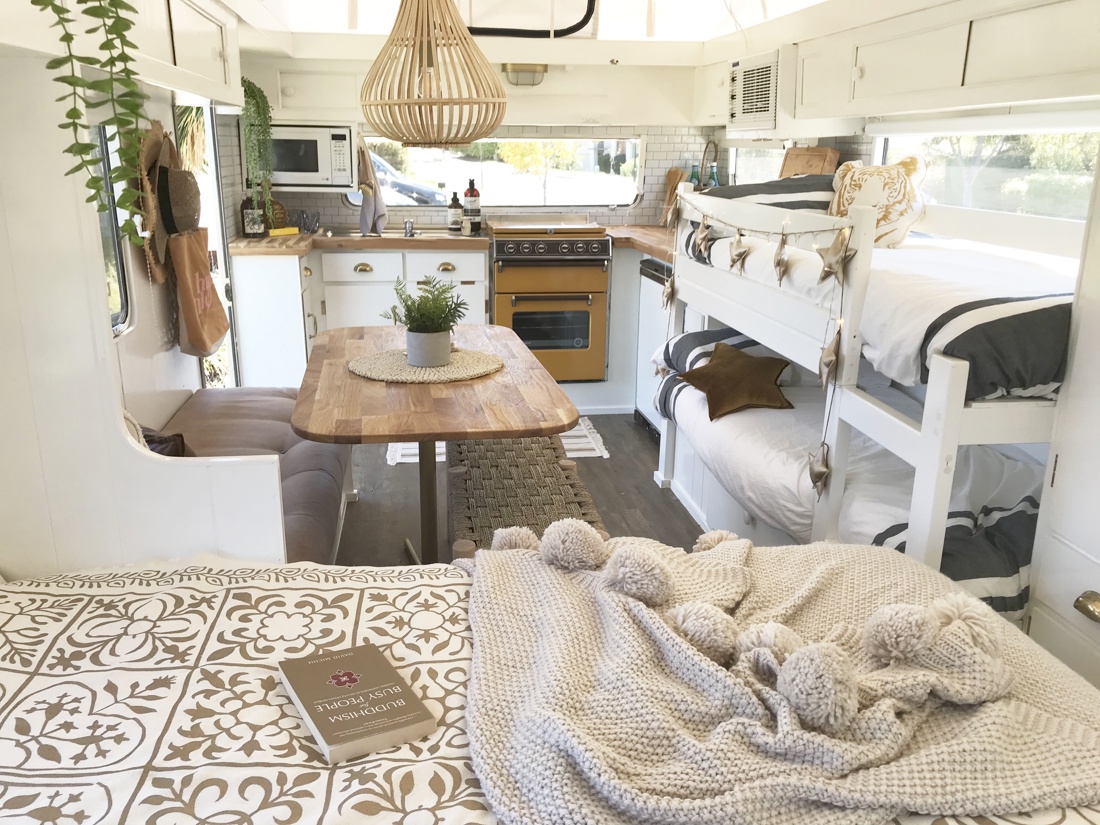
- Convert one bench seat into bunk beds
- Convert double bed into queen gas-lift bed and knock out side table
- Re-build bedroom side cabinetry
- Remove glass windows and replace with Perspex windows
- Build microwave box recess
- Replace old canvas on pop-top
- Cut and replace bench tops
- Paint throughout
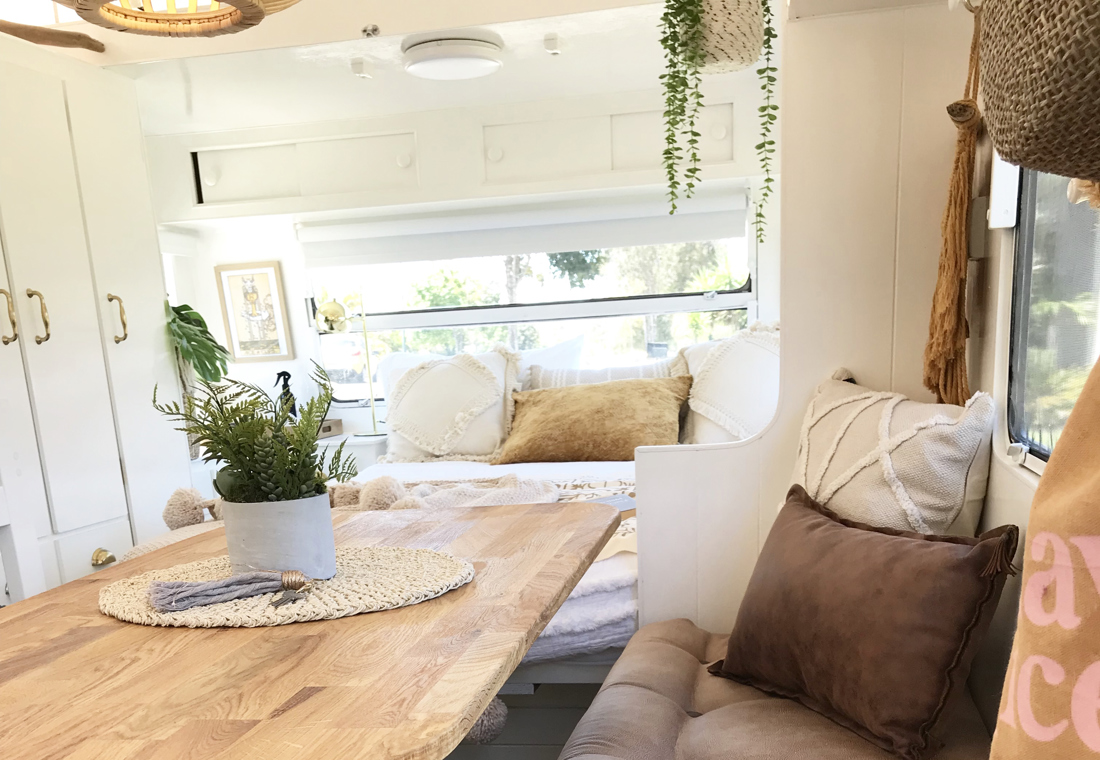
Picture, thousand words: The results speak for themselves.
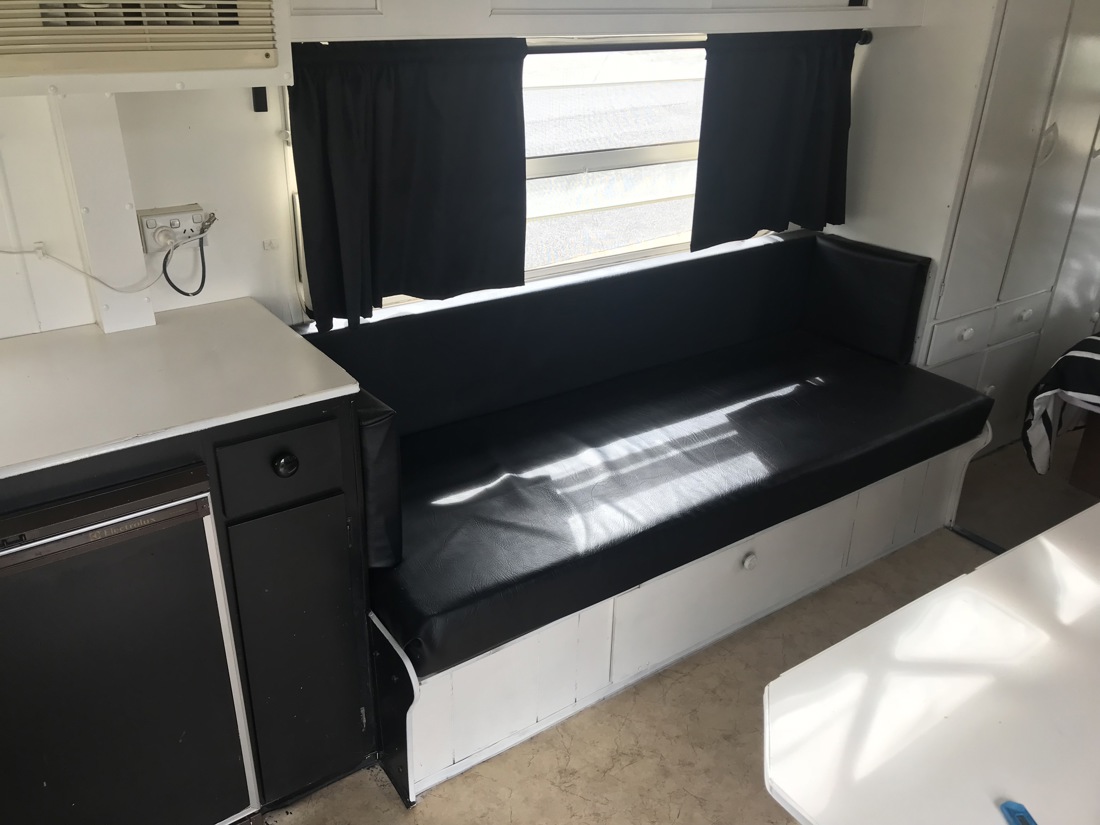
- Reupholster bench seat (outsourced)
- Replace and re-cut table top to match bench tops
- Spray paint existing table legs (White Knights Squirts – gold)
- Tile kitchen splashback (Tic-Tac Tiles – subway mono)
- Attach brass fixtures to cupboards and doors (Bunnings)
- Lay flooring and skirting boards (Bunnings – walnut grain vinyl)
- Install roller-blinds (Windoware – Bunnings)
- Install light fittings (main pendant from EGLO Lighting. Thanks to Ross, our sparky friend and all-round legend)
As yet, we haven’t made any changes to the exterior in terms of repainting. Down the track we would like to, but for now we’ve reached the budget we allocated for our renovation. And it’s what’s on the inside that counts, right?!
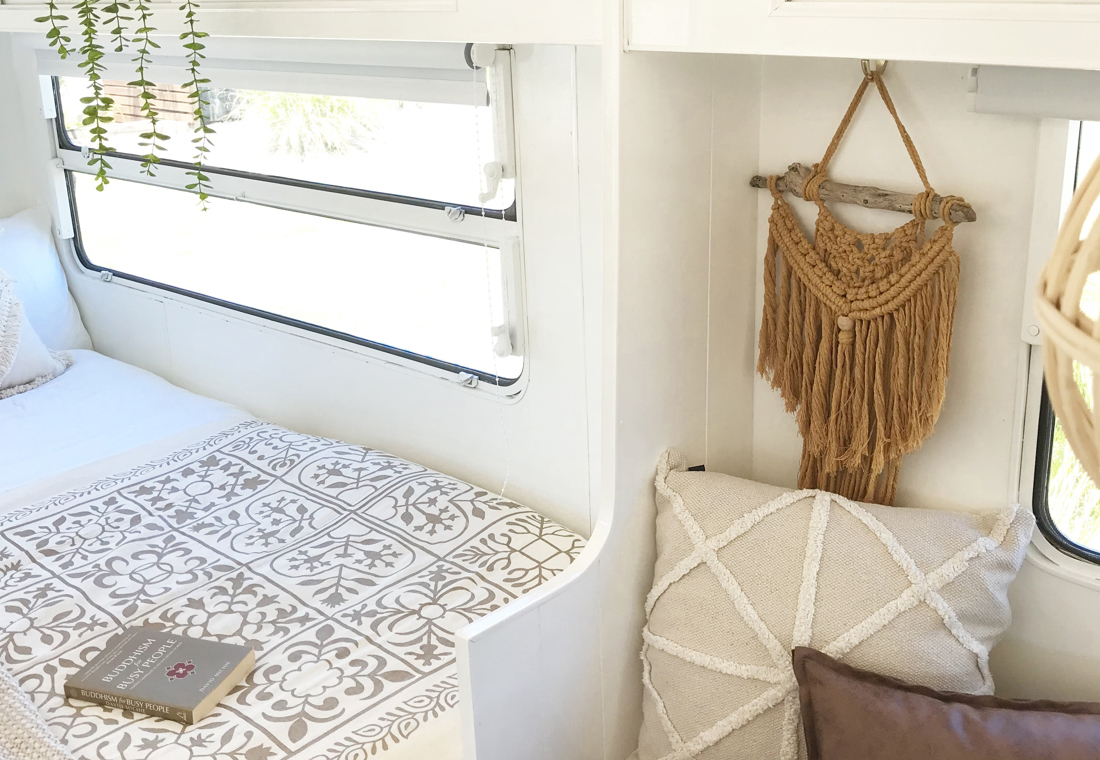
Attention to detail.
Styling
That oven! I had a love-hate relationship with the oven! At first, I wondered all the ways that I could change the enamel colour. Yet after so many people highlighted it as their favourite feature, I started to look at it in a whole new light. Mustard would soon take its place as the feature colour in my otherwise neutral palette.
Personally, the styling aspect was my favourite part of the renovation.
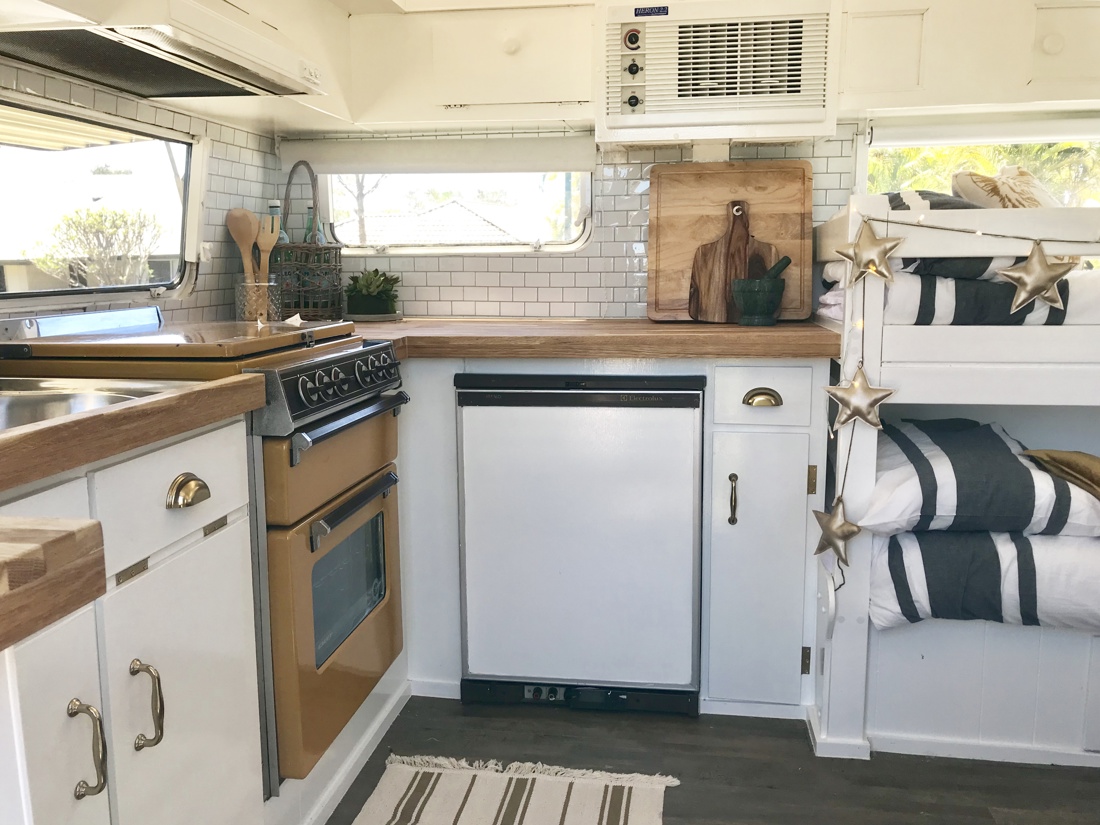
No ovens were harmed in the re-making of this van.
Putting together the finishing touches and curating the pieces that would give our caravan its character and feel, were highly rewarding.
I wanted to go with a bohemian-luxe theme with a splash of greenery. I sourced from Ikea, Adairs, Target, Kmart, Leo and Bella, many-a-two-dollar-store, and an absolute little treasure trove of a shop here in Brisbane: Osbourne and Co.
Just wow.
Go your own way
We have unofficially named our vintage beauty ‘Fleetwood’. This is a nod to her gypsy, dreamy feel and reference to a band I grew up making memories to, Fleetwood Mac. We look forward to doing the same as a little family with Bigg dreams!
See more of the Bigg’s adventures on Instagram: @bigg.dreams or say hi if you see them on your next BIG4 stay.
Inspired? You should be!
Isn’t it time you had a caravanning adventure? Book your next BIG4 break now. It all starts here.